When you use images in your file, you should always be careful, as they represent a risk to printing quality. It is not because they look OK on your monitor that they will necessarily look good in print, unless you take the necessary steps.
The first thing to do of course, is make sure that your document is set to CMYK color mode. You can read more about this in our dedicated blog article, and in the next tutorial.
Second, you must always use high resolution bitmap images. As you can read here, two types of images and graphics exist: bitmap images, which are made up of pixels or dots; and vector images, which are made by formulas and not pixels.
Bitmap images are made up of individual pixels that contain color information and intuitively, the more pixels that are in an image, the sharper that image will be. The number of pixels in an image is measured by its resolution, and expressed in DPI (dots per inch) or PPI (pixels per inch). For printing purposes, the standard is to always use images with 300dpi or more. If an image has a resolution of less than 300dpi, there will be a high risk of blurriness or pixelation during printing.
That is why you should always check the resolution of the images that you are using in your artwork. To do that, you simply need to check the file properties of your image (in Windows Paint for example) before using them.
NB: you cannot check the resolution of individual images in Photoshop, because it treats the entire canvas as one single image
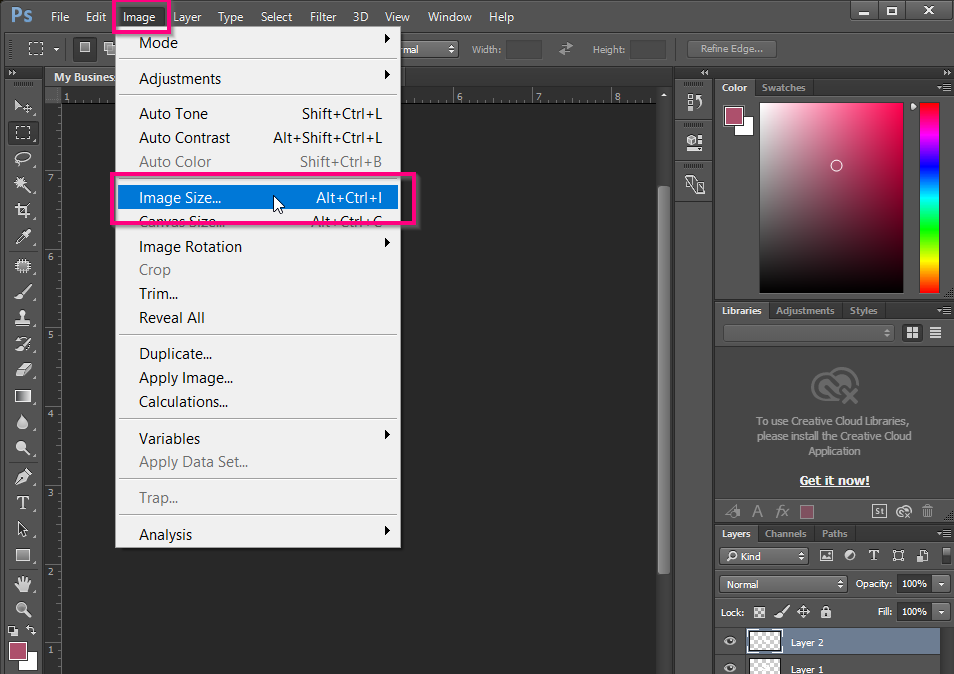
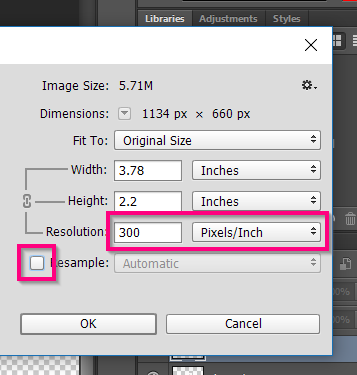
To verify the resolution of your final artwork file, you can click Image > Image Size from the top menu.


If the resolution that you see here is lower than 300dpi, you should start a new file according to the steps that we outline in the tutorial “Create File”. The reason why you need to create a new file is that if you simply change the resolution in this box, it will resize your file and will not match the dimensions of your product anymore.


