Adobe Photoshop allows you to very simply create a new artwork file for printing. When you create your new file, you will already be asked to set some important configuration details, which we will explain in this tutorial.
Even though Photoshop is not the best design software to create artwork files for printing, there is actually a correct way to set up your files, which ensures high quality printing.
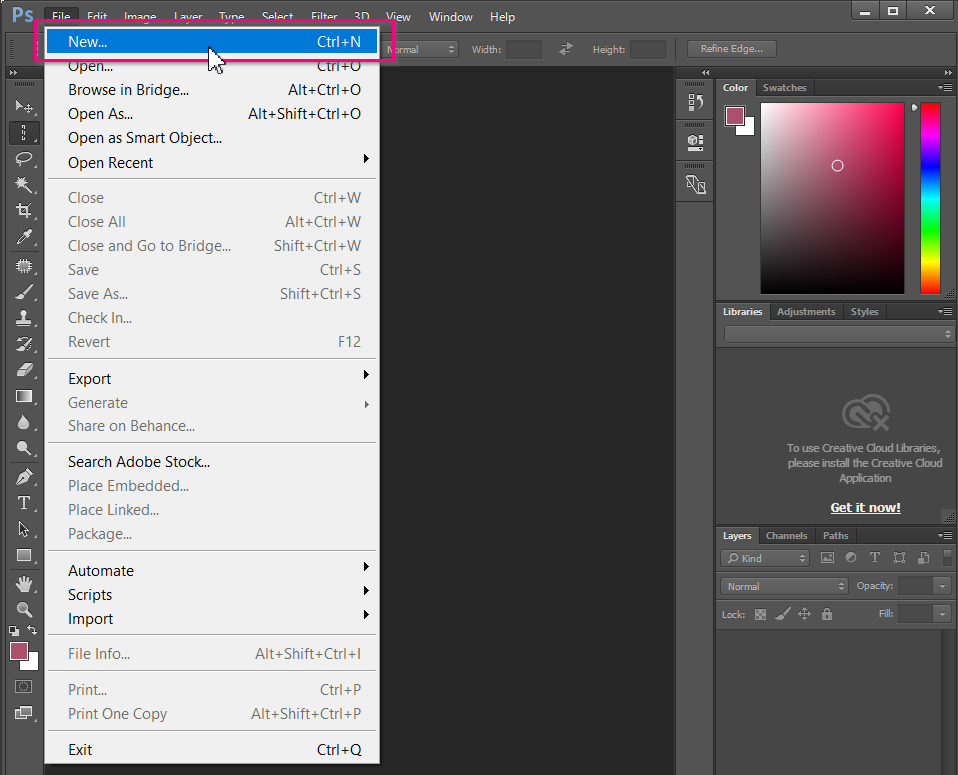
After you open Adobe Photoshop, create a new file by File> New in the top menu

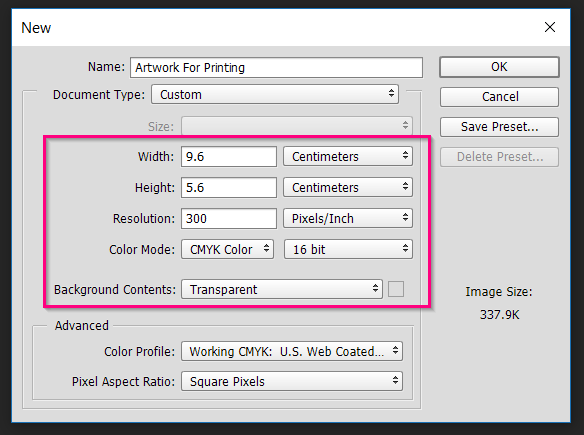
In the pop-up window that automatically opens, you will get the chance to give your file a name, as well as to adjust some important settings, as shown in the screenshot below.

-
Give your file a name that will make your file easily recognizable. For example, if you’re designing business cards for Don, make sure to call your file something like “Don’s business cards - 2017”
-
Since Photoshop has no bleed setting, when you set the dimensions of your file, make sure to add 3mm of bleed on each side of your canvas. For example, if the business cards that you are designing should come out in the final format of 9x5cm, you should set the dimensions of your design canvas in Photoshop to 9.6x5.6cm. More on format here, and more on bleed here.
-
In the Resolution field, please enter at least 300 pixels / inch, otherwise your final printed files risk being blurry. More on resolution here.
-
Set your file to CMYK in the field Color Mode, with 16bit resolution. More on CMYK here.
-
Try to always keep the color of the Background Contents as Transparent.
Note: These few settings are crucial if you want to set up an artwork file for printing in Photoshop. Never mount your file in Photoshop without first configuring these fields.
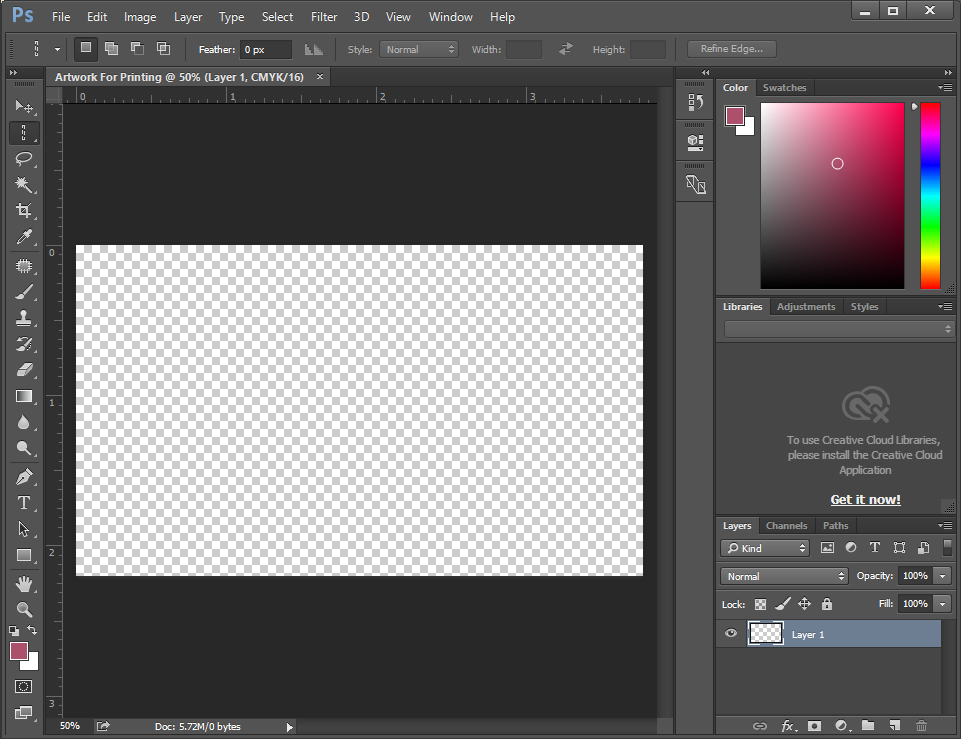
Once you set these fields correctly, click OK, and your file should look something like this:


