Since printing processes rely on the CMYK color model, you must always set your artwork files to CMYK color mode. To read more about CMYK and RGB colors, check out this article.
Of course, it is always best to set your canvas to CMYK mode from the very beginning. But If you accidentally created your artwork file in RGB color mode, you can follow the steps outlined below to convert it to CMYK mode.
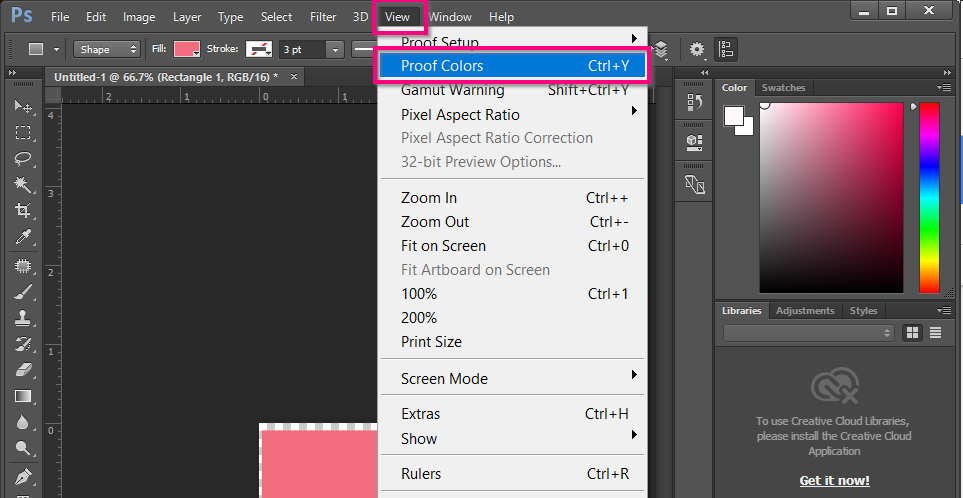
Since changing the color mode in your file is permanent (i.e. the change cannot be reverted), you might want to preview it in CMYK before the color conversion process. To do so, click View > Proof Colors in the top menu

The name of the tab should now show you that you are viewing your file in CMYK. But careful, the color mode of your file is not converted at this point. It is just a preview. To change it permanently, you must follow the steps below.

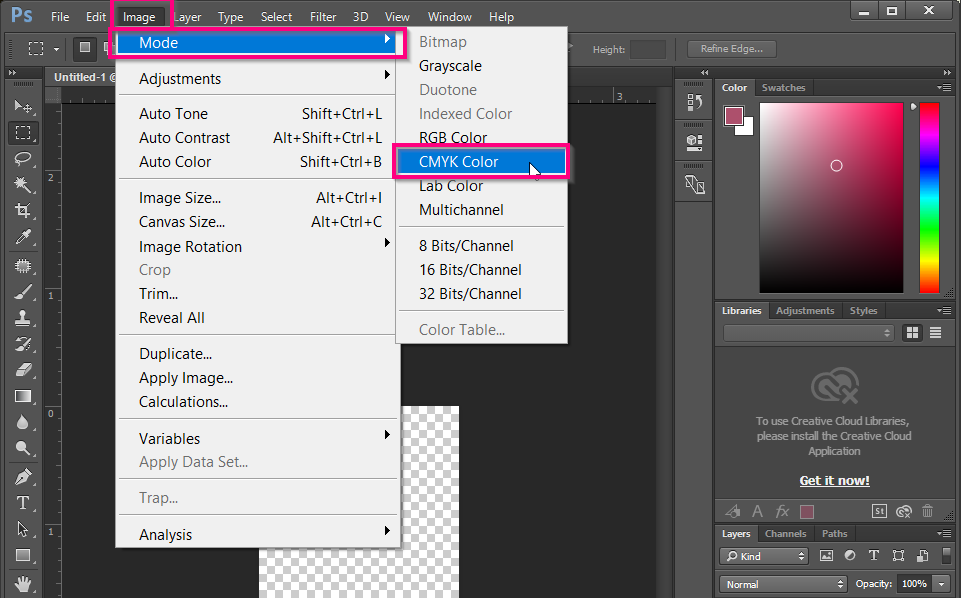
When you are ready to change the mode of your file, navigate to Image > Mode > CMYK Color from the top menu:

After clicking, some warnings may appear. First, if your file has smart objects, a first pop-up will mention that changing modes can affect the appearance of smart objects, and ask you if you want to rasterize. Click Don’t Rasterize.
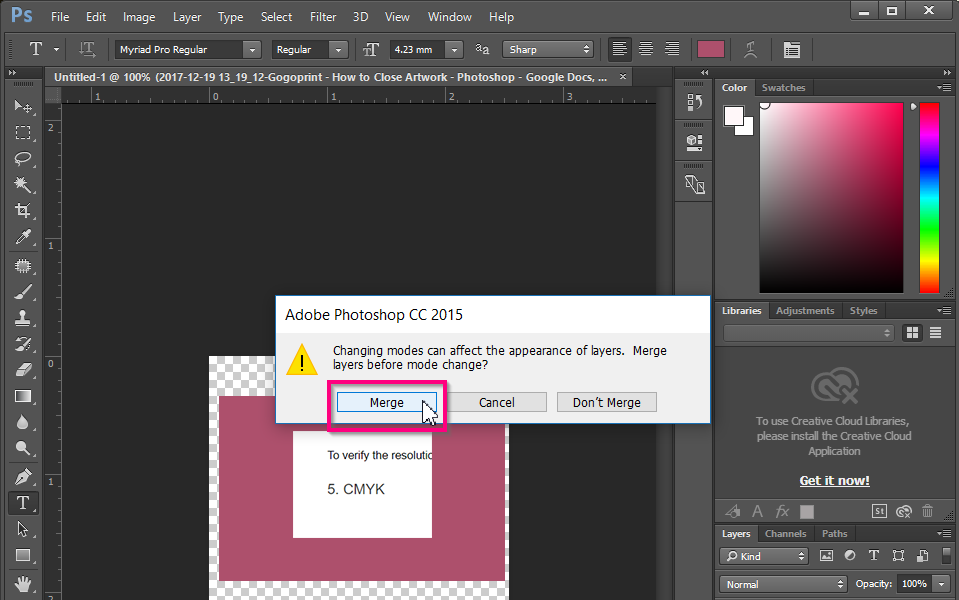
After that, the program may warn you that changing modes can affect the appearance of layers. To keep the same appearance, click Merge. If you’re willing to take the risk, you can click OK.

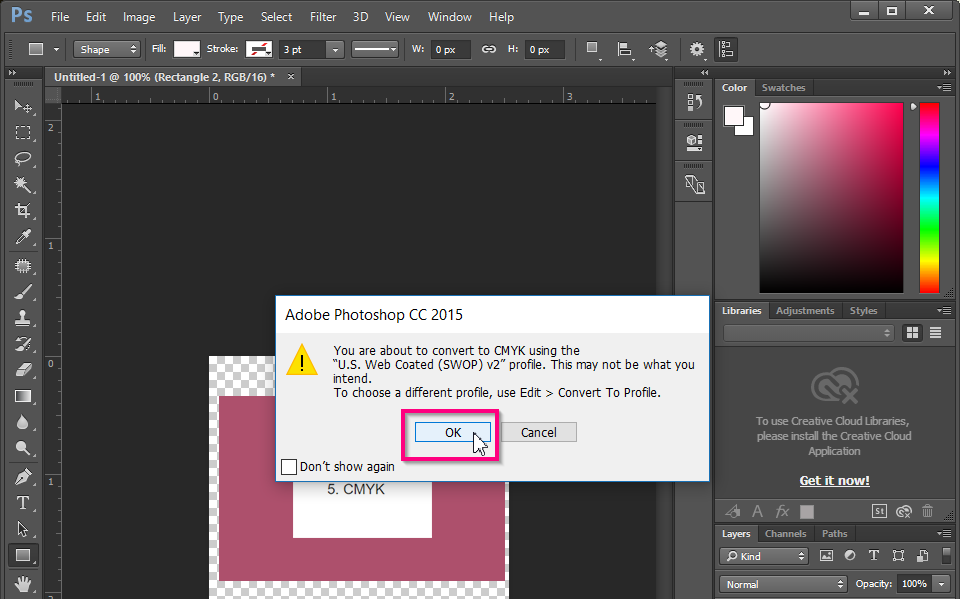
Finally, the third pop-up notice informs you which CMYK profile will be used for the conversion. You can simply click OK.


