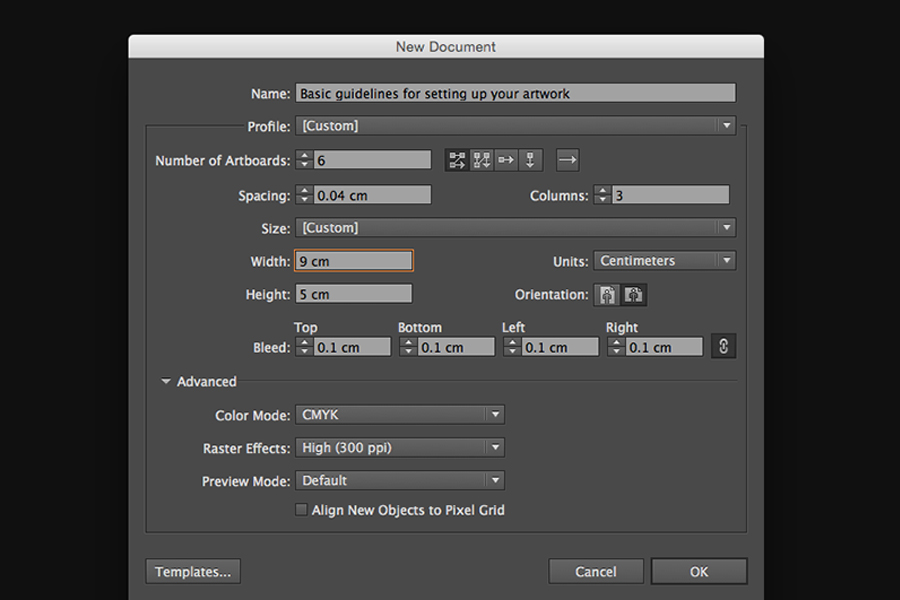
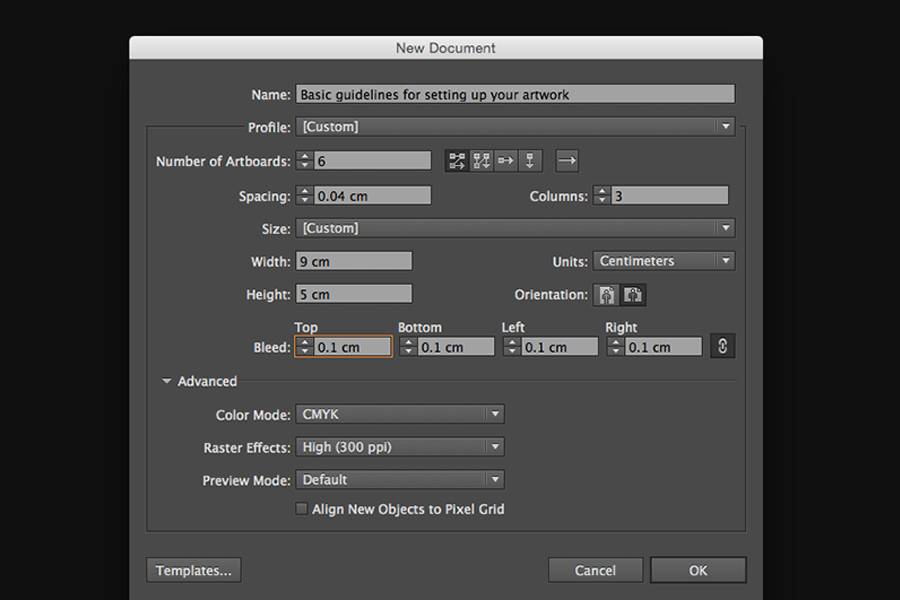
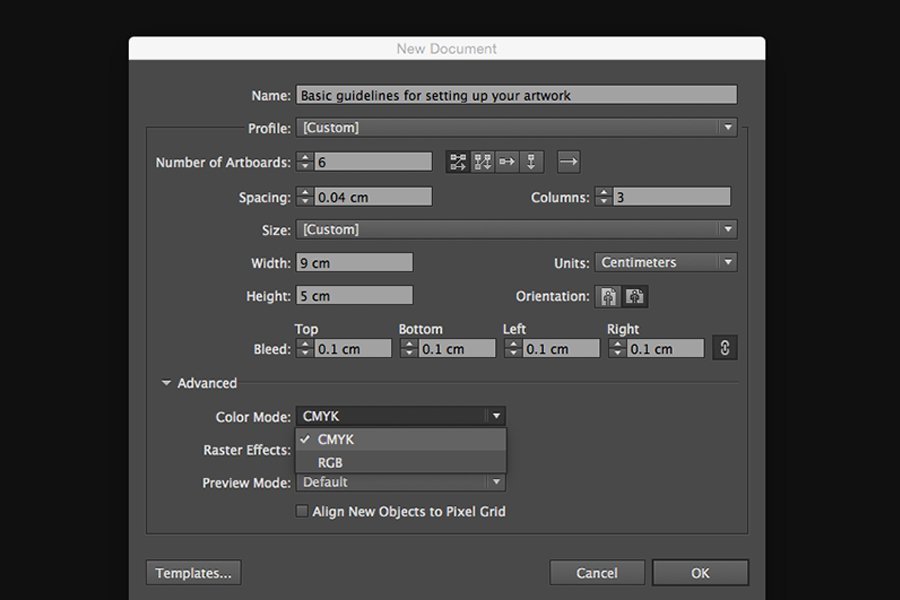
To avoid forgetting to correctly configure some settings of your artwork file, it is always best to start working from the start on a file with the basic requirements already fulfilled. Mainly, you should always ensure to correctly set the dimensions of your artwork, bleed, and color mode. These are the absolute basics to ensure reliable print quality when you send in your artwork.
Format and dimensions
Although this may sound very basic, please ensure that you know which product you want to print, and which formats are available for this product. You can do this by choosing a product from the drop-down menu above or from our homepage, and looking in the configurator.
Once you know in which format you want to print your product, check the precise dimensions of that format and set the width and height of your artwork file to those numbers. For an overview of main standard formats and their dimensions, please refer to our blog article on the subject. If you wish to order a product with print on both sides of the paper, please make sure that there are two artboards in your artwork file.
You can set the dimensions of your artwork, as well as the number of artboards, in the settings window that pops up when you create a new document in your design software.

If you’re unsure about the dimensions of the file that you are working on, and want to check/change it, please refer to this dedicated tutorial.
Bleed
As we explained in our previous blog article, bleed and margins are crucial to ensure that the cutting process does not happen too far in or too far out of your artwork. In the window that pops up when you create a new file in your design software, remember to set bleed to 3mm on all sides of the artwork. To set the safety margins in Adobe Illustrator, and check/change the bleed on an existing file of yours, please refer to this dedicated tutorial.

Color mode
As explained in our blog article on CMYK vs. RGB color mode, files for printing need to be set to CMYK color mode to ensure that colors come out the right way. You can easily choose CMYK color mode in the window that opens when creating a new file. You can also read our dedicated tutorial on setting your file to CMYK if you want to check/change that in your existing file.

If you remember to set these elements properly, you already rule out any potential problems that could emerge during printing and will be one step closer to the perfect print file. For an illustrated tutorial on how to set these elements when creating a new artwork file, please refer to this page
Stay tuned for more printing and artwork design related news on the Gogoprint blog!


